Simple Workbench Anchoring for Zero Movement
By Aisha Thompson • 1st Dec
When your steel workbench shifts during critical tasks, precision goes out the window. Proper workbench anchoring isn't just about security, it is the foundation of every accurate cut, clean joint, and professional finish. Whether you're working with hand tools, power tools, or delicate assemblies, a stable bench transforms your workflow from frustrating to flawless.
Why Your Bench's Stability Makes or Breaks Your Craft
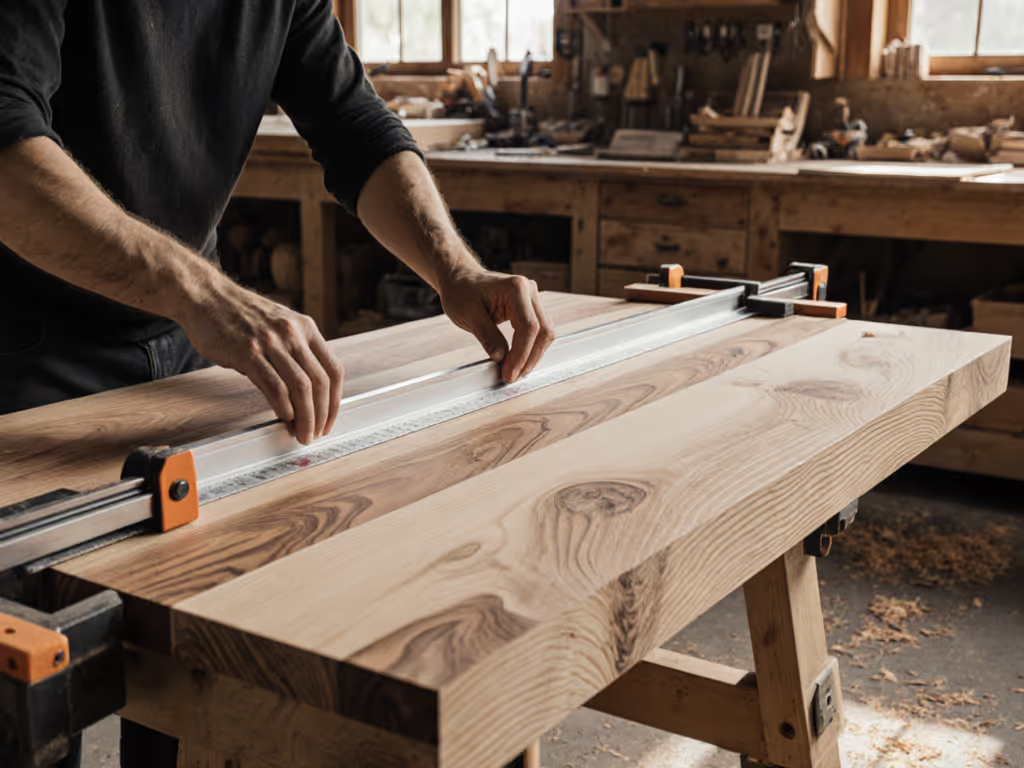
Late last Tuesday, I watched a talented maker struggle through a dovetail exercise. Every hammer tap sent his bench skidding across the garage floor, forcing him to constantly reposition. Sound familiar? That is the exact scenario I faced in my first solo build, wasting hours chasing clamps and tools buried under lumber. A mentor reset my thinking: proper anchoring isn't the final step; it is where craftsmanship begins. For how leg geometry, stretchers, and floor systems drive rigidity, see our workbench stability engineering guide.
Begin with workflows; the right bench choices follow.
Your bench should disappear beneath your hands (not literally), in the sense that you stop noticing it. When your work surface stays put, your focus stays on the work. Here is what stable anchoring delivers:
- Precision consistency: No movement means no drift in measurements or cuts
- Physical comfort: Reduced strain from fighting an unstable surface
- Tool longevity: Vises and hardware last longer when not subjected to constant shifting
- Safety assurance: Zero risk of workpieces sliding during critical operations
The No-Wobble Anchoring Checklist
Following a systematic approach prevents the "oh, I should've done that first" moments that derail projects. This checklist applies whether you're setting up a new bench or stabilizing an existing one.
Step 1: Assess Your Foundation
Different workshop floors require different anchoring strategies:
- Concrete: The gold standard for permanent anchoring (use wedge or epoxy anchors)
- Wood subfloor: Requires specialized fasteners that reach structural framing
- Dirt/gravel: Best for temporary setups with earth anchors
Pro Tip: Tap your floor with a hammer; if it sounds hollow anywhere, avoid anchoring in that spot.
Step 2: Position for Performance
Before drilling a single hole:
- Map your primary workflow zones (chiseling, planing, assembly)
- Place heaviest tools (like vises) directly over potential anchor points
- Ensure clearance for seating and movement around the bench
This strategic placement transforms basic workbench floor mounting into a performance-enhancing system. I once helped a cabinetmaker reposition his bench six inches closer to natural light, just enough to eliminate eye strain during detailed inlay work.
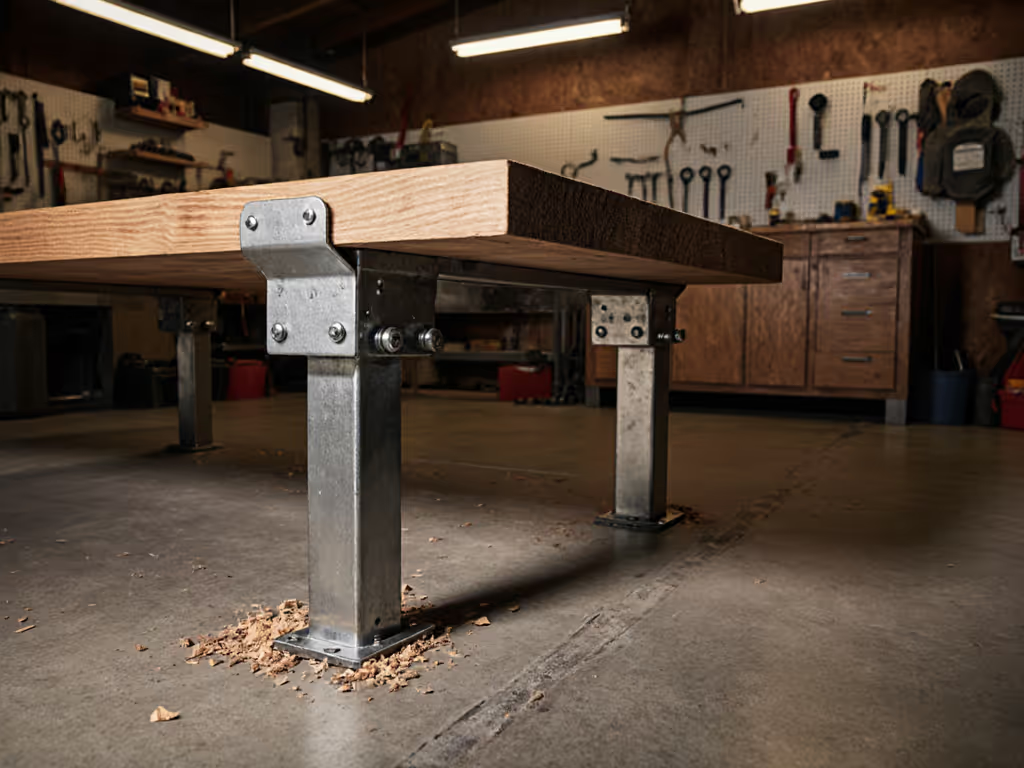
Step 3: Select the Right Anchor System
Choose based on your floor type and bench weight:
| Floor Type | Recommended Anchors | Best For |
|---|---|---|
| Concrete | Wedge anchors, epoxy anchors | Permanent steel workbenches |
| Wood subfloor | Structural screws with washers | Mobile setups needing stability |
| Dirt/gravel | Auger-style earth anchors | Temporary workshops |
For concrete floors (the most common workshop surface), I often recommend Simpson Strong-Tie connector screws because they are engineered for the precise load requirements of workshop floor anchors and they create an incredibly secure connection between bench legs and floor. If you need mobility without wobble, pair anchors with a workbench caster system that locks solidly under load.
Step 4: Anchor with Engineering Precision
This is where most DIYers cut corners, creating future frustration. Follow these steps for maximum stability:
- Measure twice, drill once: Mark anchor points precisely under bench legs
- Drill to spec: Use the correct bit size and depth for your anchors
- Clean holes thoroughly: Blow out concrete dust with compressed air
- Insert with care: Follow manufacturer torque specifications
- Test before trusting: Apply gradual pressure from multiple angles
Critical Safety Note: Never stand directly over drilling operations, concrete shards can travel with dangerous force. Review essential workbench safety features before drilling or fastening.
Step 5: Add Triangulation for Maximum Rigidity
The professional secret for eliminating subtle movement: cross-bracing. A simple diagonal brace from bench top to floor creates a triangle (the most stable geometric shape).
- Cut 2x4 scraps to form diagonal supports
- Anchor at both ends with structural screws
- Position braces to avoid workflow interference
This step transforms good workbench stability techniques into world-class performance. One woodturner I coached added just two diagonal braces to his rolling assembly table, and immediately gained the confidence to tackle delicate spindle work.
Critical Mistakes That Sabotage Your Stability
Avoid these common pitfalls that undermine your anchoring efforts:
- Over-tightening anchors: Creates stress points that compromise long-term stability
- Ignoring floor conditions: Anchoring into cracked concrete or soft wood subfloor
- Inconsistent spacing: Uneven anchor distribution creates weak points
- Skipping the test phase: Assuming stability without verification
Remember: workbench stability techniques aren't about brute force, they are about precision engineering for your specific workspace. Stubborn racking can also stem from an undersized top—consult our workbench top thickness guide for data-backed targets.
The Confidence Multiplier
When you solve the movement problem, something remarkable happens: your entire workshop experience transforms. Tasks that previously caused frustration become satisfying challenges. Your tools perform better. Your results improve. Most importantly, you'll stop wasting creative energy managing equipment instead of making.
Clear homes end clamp hunts, and this applies to your bench's relationship with the floor too. When your foundation is rock solid, your focus stays where it belongs: on your craft. I've watched countless woodworkers experience this "aha" moment when they finally secure their bench properly, it is like unlocking a new level of capability.
Your Next Steps
Begin today with one simple action: test your bench's stability. Push firmly from multiple angles. Notice any movement, rocking, or shifting. Document what you find, then choose one anchoring improvement to implement this week.
For those ready to dive deeper:
- Research local building codes regarding workshop modifications
- Experiment with temporary anchoring solutions before permanent installation
- Document your bench's performance before and after anchoring improvements
Your journey to perfect stability starts with a single anchor point. Every great workshop began with someone deciding "enough is enough" with wobble and movement. That craftsman could be you, starting today.
Remember: the right bench choices follow when you begin with workflows. Your tools may be modest, but with disciplined setup, they'll perform like world-class equipment.
Related Articles