Glue-Resistant Workbench Coatings: Tested & Ranked
By Elena Kovács • 19th Feb
Your glue-resistant workbench top isn't just about aesthetics (it is a functional barrier that protects your investment, extends surface life, and preserves the flatness your joinery demands). Yet too many makers treat this choice as secondary, only to spend hours chiseling dried glue from hardened finish or watching their top's integrity degrade under seasonal moisture and adhesive exposure.
The right workbench top sealant decides how easily glue releases, how water-based and polyurethane adhesives interact with your surface, and how much maintenance you'll actually perform. For long-term care strategies that prevent rust and reduce adhesive buildup, see our workbench surface maintenance guide. This guide walks you through selecting, comparing, and applying finishes that genuinely resist common workshop adhesives (and it is informed by the adhesive behavior data that determines how different coatings will perform under real conditions).
Why Surface Choice Matters: The Glue-Resistance Formula
Workbench tops face a paradox: you want a surface that accepts clamps without slipping, holds flat under load, yet releases glue before it sets permanently. The wrong coating invites two outcomes: adhesive bonds so firmly you damage the finish removing it, or the finish fails entirely under moisture and repeated chemical exposure.
Glue-resistance depends on three measurable factors: surface porosity, chemical compatibility, and cure-time resilience. A porous finish absorbs water-based adhesives and swells unpredictably. A surface whose chemistry mirrors your glue's binder (both polyurethane-based, for example) can fuse rather than shed. And a finish that hardens too slowly lets glue seep into the substrate.
Different adhesive types demand different strategies. Polyurethane glues (which foam, cure through moisture, and generate mechanical interlocks) require non-absorbent, low-porosity surfaces. PVA-based glues (Titebond and Elmer's) activate with moisture and bond through film formation; they demand surfaces with minimal water uptake. Understanding your shop's primary adhesives narrows the field fast.
Step 1: Audit Your Adhesive Inventory and Usage Patterns
Before selecting a coating, catalog what actually lands on your bench.
List your primary adhesives: Are you primarily using water-based PVA glues like Titebond II or III for interior work? Running polyurethane-based construction adhesives for exterior pieces? Mixing epoxy for repairs or laminations? Each adhesive class (PVA, polyurethane, epoxy, hide glue) behaves differently on different surfaces.
For most bench work in the amateur to professional small-shop range, PVA-based adhesives (Titebond Original for interior, Titebond II for light water exposure, Titebond III for continuous moisture) dominate.[1][2] These are water-based, non-toxic to handle, and set through moisture evaporation and PVA film coalescing. Their strength is proven and repeatable (in controlled testing, Titebond III delivers consistent shear strength above 1,500 pounds across samples,[1] and Elmer's Max shows similar water-resistant reliability).[1]
Document frequency: Do you glue up three times weekly or monthly? High-frequency adhesive contact demands more resilient, faster-releasing finishes. Low-frequency work permits riskier, softer options.
Note surface temperature: Workshop temperature during adhesive cure affects finish performance. PVA adhesives work best between 60 to 70°F; Titebond III bonds improve with boiling water exposure due to crosslinking activation.[3] If your shop runs cold or hot seasonally, the finish must buffer that variability without degrading.
This audit takes 15 minutes and anchors all downstream decisions.
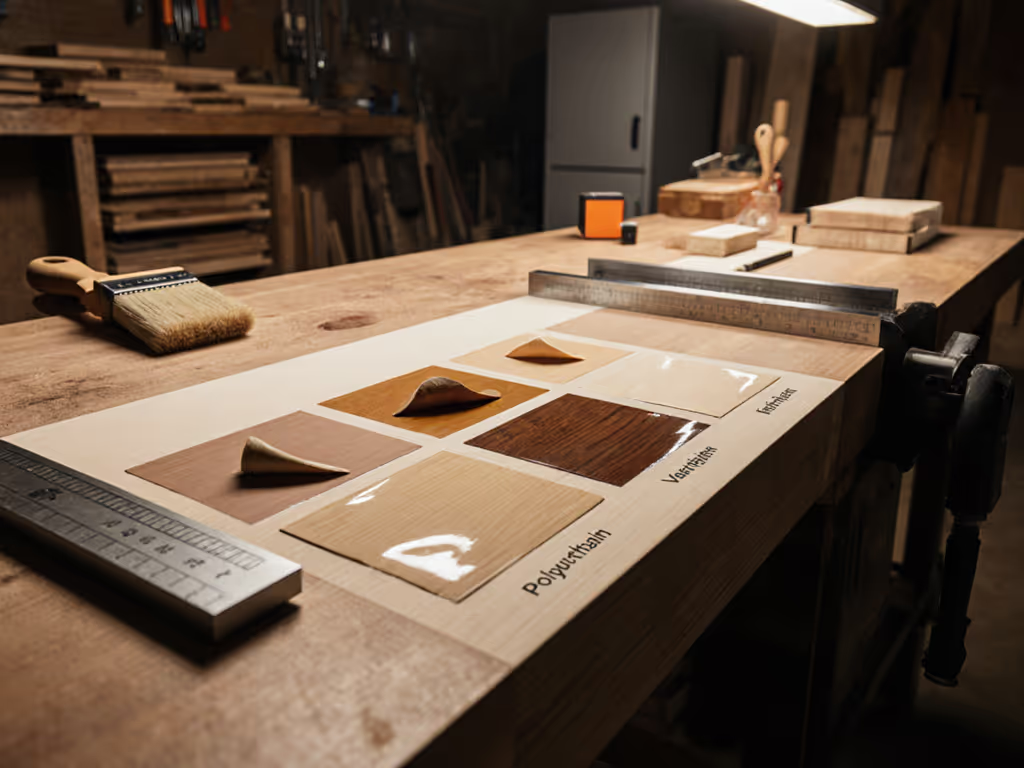
Step 2: Understand Your Coating Categories and Their Trade-Offs
Four finish families dominate glue-resistant bench tops. Each sacrifices something to gain glue-resistance; knowing the cost matters.
Polyurethane Topcoats (Water-Based or Oil-Based)
Polyurethane finishes (especially water-based polyurethane) build hard, moisture-resistant films that resist PVA absorption and release most adhesives cleanly. Oil-based polyurethane outperforms water-based in pure durability, but water-based versions cure faster (6 to 8 hours) and emit fewer fumes in shared spaces.[4]
Advantage: Tough, repeatable, and widely available. Most poly finishes sand back easily when scarred, making them repairable.
Drawback: Polyurethane films can be slippery (essential for glue release but problematic for clamp-holding without rubber pads). Not all PVA adhesives release cleanly; some light film creep can occur if the cure is interrupted by moisture from the glue.
Conversion Varnish (Pre-Catalyzed)
Conversion varnish (a pre-cat lacquer or catalyzed polyester) cures to a harder film than standard polyurethane, bonds through chemical cross-linking rather than evaporation, and resists both water and solvent intrusion. Professional cabinet shops favor this for high-contact surfaces.[4]
Advantage: Rock-hard, resistant to adhesive penetration, and releases glue predictably.
Drawback: Requires spray application (HVLP or conventional), demands ventilation, and costs 3 to 4x polyurethane. Not practical for brush-on benchtop work in most home shops. Requires disposal of catalyzed material.
Epoxy Topcoat
Two-part epoxy resins create non-porous, chemical-resistant barriers that actively repel water and adhesive solvents. When mixed and applied correctly, epoxy cures to a glass-like surface that sheds most adhesives without sticking.
Advantage: Unmatched water and chemical resistance. Ideal for benches exposed to extended moisture or mixed adhesives. Repairs are straightforward (sand and recoat).
Drawback: Expensive per application, lower film-build than poly in a single coat, exothermic cure (generates heat), and mixed epoxy has a working window of 20 to 30 minutes. Requires precise mixing ratio and can be brittle if over-catalyzed.
Lacquer and Shellac (Soft-Coat Systems)
Traditional finishes like dewaxed shellac and nitrocellulose lacquer remain permeable, allowing moisture and solvents to pass through. This softness means glues don't bond mechanically to the finish film.
Advantage: Reversible. If glue bonds, dissolve it with the same solvent the finish used (alcohol for shellac, lacquer thinner for lacquer). Repair by burnishing or re-coating. Traditional craft aesthetic.
Drawback: Poor moisture resistance. PVA water content will soften shellac and raise grain. Not suitable for benches near sinks or in damp climates. Wear faster than poly or epoxy.
Step 3: Match Coating to Your Top Material and Shop Environment
Finish performance hinges on substrate and context. If you're still deciding on the substrate, our bench top material guide compares options by project needs.
Hardwood tops (maple, beech, birch): These are traditional and forgiving. A water-based polyurethane (3-4 coats, sanded between) or conversion varnish (2 coats) gives excellent glue-resistance on a stable base. If budget is tight, dewaxed shellac works, but re-seal every 18 months. Your posture is a spec; design the bench around it (and a protective finish is part of that design). For dialing in bench height to reduce strain, use our science-backed sizing guide.
MDF or plywood tops: Particleboard and veneered tops require aggressive sealing because raw substrate absorbs water and adhesive solvents. Epoxy is the most reliable here, or a water-based poly with a primer coat. Avoid shellac; it won't seal particle board adequately.
Workshop humidity and temperature: Dry shops (basements with heating/cooling) tolerate soft shellac. Damp garages or shops with seasonal swings need water-resistant poly or epoxy. Unheated spaces need finishes flexible enough to expand and contract without checking.
Step 4: Preparation and Application Protocol
Coating performance is 70% preparation.
-
Sand the top flat: Use 120-grit, then 180-grit. Dust completely. Any grain left standing will telegraph through finish and trap glue.
-
Fill voids and flatten edges: Any cracks or dings collect adhesive; fill with epoxy putty and sand flush. Round sharp corners slightly so finish wraps evenly.
-
Apply primer if needed: On porous substrates (MDF, unfinished plywood), prime with the same chemistry as your topcoat (water-based poly primer for poly topcoat, epoxy primer for epoxy). This prevents adhesive from wicking into substrate.
-
Apply thin, even coats: Two thin coats outperform one thick coat. Thin coats cure faster and more completely, reducing risk of soft spots that trap glue.
- Water-based polyurethane: 3-4 coats, 4 to 6 hours between coats, 220-grit sand between after coat 2.
- Epoxy: 2 coats (follow manufacturer mixing and pot life), cure per instructions (typically 24 hours full hardness).
- Shellac: 4-5 coats, 2 to 3 hours apart, no sanding between unless dust appears.
-
Control dust and temperature: Apply at 65 to 75°F and 40 to 60% relative humidity. Dust settles into wet film, creating grit. Block off the shop and wait 2 hours before touching the bench after final coat.
Step 5: Glue-Release Testing and Field Adjustment
Before committing to production glue-ups, test your chosen finish against your actual adhesives.
Test protocol:
- Apply a generous bead of your primary PVA adhesive (Titebond II or III, for example) to a scrap of coated wood in the same orientation as your bench top.
- Let cure fully per adhesive instructions (24 hours for most PVAs).
- Attempt to remove dried glue using a plastic scraper, chisel, or card. Note whether the glue releases clean, peels with finish damage, or won't budge.
- Score the adhesion: Excellent (peels clean), Good (minor finish marks), Adequate (requires force), Poor (won't release).
Run the same test with polyurethane glue if you use it; behavior differs significantly from PVA.
Field iteration: If your chosen finish rates Adequate or Poor, increase coat count (one more pass) or switch to a harder system (water-based poly to epoxy). Document the change and re-test.
This step adds one week to your prep timeline but saves hours of frustration later.
Step 6: Maintenance Schedule to Sustain Glue-Resistance
No finish is permanent. Glue-resistance degrades with use, especially at high-contact zones (directly under your vise, frequent clamp points). For a time-based checklist with daily-to-annual tasks, use our workbench maintenance schedule.
Monthly: Inspect for soft spots, dings, or areas where glue penetrated. Mark them with tape.
Quarterly: Sand any damaged zones with 220-grit and touch up with matching topcoat. One thin coat is enough if the substrate remains sealed.
Annually: Full inspection and light sanding (220-grit, whole surface). If adhesive is sticking or not releasing cleanly, apply one refresh coat of your topcoat.
Every 3 to 5 years (depending on use intensity): Consider a full recoat (1-2 additional coats to restore film thickness) or complete removal and refinish if the original finish has worn thin.
This calendar-based approach prevents the slow decline that forces a complete bench refinish later.
Why This Matters: A Personal Foundation
After a long run of dovetails early in my shop practice, I realized my frustration wasn't the work (it was glue cleanup). Adhesive had bonded to a soft finish, and removing it damaged the surface. I learned that investment in the right sealer and discipline around testing transforms that daily friction. The bench became invisible; the craft became visible. Your workbench surface is armor, not an afterthought.
Your Next Step: Test and Document
Select your top material (hardwood, plywood, or MDF), identify your primary adhesive (Titebond II for interior, Titebond III for water-exposed, polyurethane for construction), and choose a coating from the four categories above based on your shop's humidity and your budget.
Buy a one-quart sample, run the glue-release test on scrap, and document the result. This 90-minute investment answers whether your chosen finish will work for your hand (before you commit hours to finishing your bench). A small test now prevents a large refinish later.
Comfort and control are prerequisites for precision and consistency. A glue-resistant surface isn't ornamental; it is functional ergonomics for your bench work.
Related Articles